We have entered an interesting change in the way we work and teach. This adjustment has been smoother for some who are tech savvy or already working virtually with students but for others this is uncharted territory!
For me, my school and my students (K-5) I been approaching the simpler is better model. First, my team (Art, PE, Media and Music) is putting out ONE Google Doc with all of our content linked for all students. This will hopefully help students and families have only one place to go to access content from our department. We got this idea from many other Arts/Electives/Specials departments we've seen and been in contact with.
Just so you know more about my school and district at the moment, our district is asking us to focus more on reinforcing prior knowledge and giving content to families and NOT worrying about new content or grading at the moment. They are not looking for us to keep accountability for our students at the moment.
Here is an example of the one Google Doc we create. When students click the links it leads them to our individual content. (This is just an image, not the live doc... links will not work here)


 The fifth resource is a Studio Tour video. I have a fairly active fine arts career and I wanted my students to learn more about my artwork. At the moment I they don't know much about my personal art practice. Through these videos students will learn more about a specific topic related to my art practice and how it relates to my practice. I didn't want these videos to have a required or even suggestion activity attached to it. That felt a little self-serving since the videos are loosely about my work. For that reason I don't have activities attached.
For me, my school and my students (K-5) I been approaching the simpler is better model. First, my team (Art, PE, Media and Music) is putting out ONE Google Doc with all of our content linked for all students. This will hopefully help students and families have only one place to go to access content from our department. We got this idea from many other Arts/Electives/Specials departments we've seen and been in contact with.
Just so you know more about my school and district at the moment, our district is asking us to focus more on reinforcing prior knowledge and giving content to families and NOT worrying about new content or grading at the moment. They are not looking for us to keep accountability for our students at the moment.
Here is an example of the one Google Doc we create. When students click the links it leads them to our individual content. (This is just an image, not the live doc... links will not work here)

This is a Google Doc... If you don't know this already there are a lot of ways to make a Google Doc more personalized. If you are anything like me a plain white doc wasn't what I wanted to send out if I could jazz it up a little. Here are a couple of features I used:
- Change the page color (go to file, page set-up and click the drop down where it says page color. You can choose a standard color or customize.)
- Changed the color and weight of the table. When you create a table you have many options. To change the color of the table border, highlight the whole table and click the little pencil icon (if you hover over with your mouse it says Border Color). The same with the page color, you can choose a standard color or customize. To change the weight, click the three lines next to the Border Color pencil icon. When you hover over, it will say Border Width.
- Change the background color inside the table. To do this, highlight the whole table. Click the diamond shaped paint bucket icon. It is located next to the border color pencil icon. If you hover over, it says background color. Again, you can choose a standard color or customize.
- Change the font colors. Remember to think about readability, consider duller colors and a large contrast between background and font. This feature can be found where the capital A is next to the Bold, Italic and Underline icons. Again, you can choose standard or customize.
- Insert Google Drawing. This is a fun feature that you can do a lot with. I used it on my own choice board that you can see below. For our shared doc, I used it to simply Add a header to each section. To create and insert a Google Drawing go to the insert tab, scroll down to Drawing and hover over it. You'll see a plus sign. Click the plus sign and it'll open a Google Drawing window. There is an action drop down box, you can add Word Art. There are many options for adding lines that you can play around with. There are also options for adding shapes. There is a text box feature to add text separate from the Word Art feature. And finally you can add images. The only think I wish you could do is add a link. You CAN link the Google Drawing once you've finished and added it to your Google Doc. When you're finished with you Google Drawing click Save and Close. The Google Drawing becomes an image; you can change the size and move it around like a regular image. If you need to edit, click the image and you'll see an edit button. To link the image click the Drawing and look for the link icon or right click the image and click the link icon and add your link.
When students click on my link in the Google Doc, my Art Choice Board opens. It is also a Google Doc and I used many of the same features I described above. I have four categories with activities and a fifth resource that doesn't have an activity "attached". The light blue boxes are Google Drawings and linked below are is the recourse(s) for that section. The polka dots are done by changing the type of border. To do this, highlight the table and click the three dashed lines. If you hover over, it says Border Dash. (This is just an image, not the live doc... links will not work here)

Here is some more information about the sections on my Choice Board.
- Family Activity: This sections is designed to be an art activity that doesn't require many materials or has adaptions to materials that can typically be found around the house. I titled it Family Activity since the materials or activity may require parent/guardian permission or help. I also think these activities would be fun to work on as a group or partnership if students have siblings in the house. Many of the activities I have for this section are ones I've seen other amazing art teachers share and post on various social media and websites. Thank you SO much to those amazing art teachers who are willing to share their work and ideas.
- Web Tutorials: This sections has links to various art tutorials websites/YouTube Channels. I'm hoping to link more than just drawing tutorials here but there are definitely TONS of drawing YouTube channels available for younger students.
- Read Alouds: This section mostly has read alouds that I created but for some books I don't own I found some on YouTube. To create my Read Alouds I took photos of a books pages (or two page spread) and put those images into iMovie. Then recorded audio reading the book and adjusted the images as needed. I also added text at the end with the name of the book, Authors name and Publisher. Fair Use laws are a little fuzzy right now and I know a lot of publishing companies have given teachers the right for read alouds during this time. As for me, I've uploaded the videos to my Google Drive and only shared to my students. Once this remote learning is over these videos will only be shared in my classroom if at all. Be careful about making your read alouds public. I have also heard that Read Alouds, even from publishers who've given teachers the go ahead, should have an activity attached... meaning assigned students something so the read aloud is attached to learning. For my read alouds I've either made up activities or found activities to share when them whether a link to a website or a downloadable PDF.
- Art Appreciation: This section has a variety of content depending on the week ranging from Art History to Art Topics (like elements/principles). I find videos (potentially separated for K-2 and 3-5) and an activity to go along with the video(s).
Some of the links for each section go to a website or YouTube video/channel. For videos (not channels) from YouTube I use safeyoutube.net or something similar instead of directly from YouTube. For other content I've created Google Slides. Below is an example of the slides from the Found Object Color Wheel. (These are just images, not the live slides... links will not work here)


Google Slides has many visual features as well. The easiest are the themes that are already available in Google Slides. Within these themes you can change colors as you see fit. If you wanted to and had the time you could play around with creating your own theme or click here.
Some features I used in the slides above are:
- Image Border: You can add a border to an image by clicking on the image and changing the border color/weight etc. It creates a nice look to a slide.
- Inserting Videos: Insert a video(s) by clicking on the insert tab and clicking video. You can choose Search YouTube, URL or Google Drive. Students can watch the video right in the slide and even make the video full screen without opening another website or tab.
- The speaker icon is a very useful but slightly cumbersome feature. Currently in Google Slides you can add audio files to your slides like you can videos or images BUT you cannot record directly into Google Slides. I found this work around online and create a screencast video showing how to do this for my school's staff. You can watch the tutorial here.
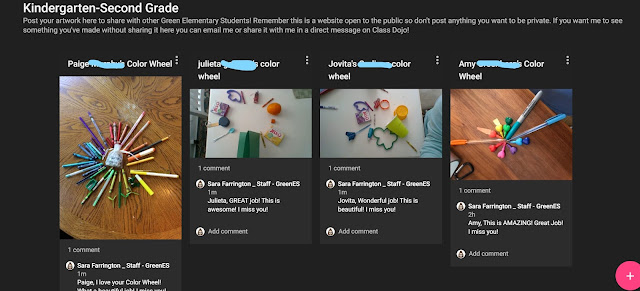
On each of my slides I have links to padlets for K-2 and 3-5. I'm not sure how this will work yet long-term but I'm giving it a try. I don't have another digital portfolio already established and I don't want students to have another place to login to or create an account for etc. Padlet allows for students to easily add images and others can view. You can also turn on the commenting feature so you can add comments. I made the background of my padlet black so the images they share will stand out and a background won't distract.
 The fifth resource is a Studio Tour video. I have a fairly active fine arts career and I wanted my students to learn more about my artwork. At the moment I they don't know much about my personal art practice. Through these videos students will learn more about a specific topic related to my art practice and how it relates to my practice. I didn't want these videos to have a required or even suggestion activity attached to it. That felt a little self-serving since the videos are loosely about my work. For that reason I don't have activities attached.
I have a version for fellow art teachers to share with their students during or after this remote learning. You are welcome to share with you students. I have started a playlist and as I create/add more videos they will be added to this playlist and made public. You are welcomed to ask students to do something after watching the video. If you do "assign" these videos and a prompt/activity I would LOVE to know what ideas you come up with! If you want to share your ideas with me, feel free to email me at farringtonsarae@gmail.com. My hope is that in the future these videos can be used by art teachers in the area(s) where my artwork is being shown in a museum/gallery and having ideas from other art teachers would be GREAT! To find out more about the Studio Tours check out this post!
Lastly I wanted you to know what I'm doing for students who either don't have access to the internet and those who may be looking for more complex activities. On my school art website I have PDF's I've found for step by step how to drawing. There are some great websites out there that I used for these resources. For these PDF's, parents/students can download where they have internet and have them available for use once home without internet. For students/parents who are looking for special activities and have special materials at home like paint or yarn, etc. I have links to various videos and websites with fun activities that may require those materials.
I sent this video to my students/families to show them how to use my resource(s). Feel free to watch to see how my Google Doc works and to see what is on my school art website.
I want to end this post with a hopefully motivational message. You are NOT expected to be perfect during this time. If you are creating instructional videos or digital content and this is new to you, then give yourself grace. Your students miss you, they don't need perfection. As much as possible give them access to your face and voice but don't stress out about this! You are wonderful and this too shall pass! Keep in contact with art teachers in your area/district and continue to check out what art teachers are doing on social media. But MOST IMPORTANTLY take care of yourself! Spend time doing things you love. If you're making personal artwork, share it with your students, they'll love it!
If you have questions or information you'd like to share feel free to comment below!
Comments
Post a Comment